After login to your zapier account. Please follow the below steps for Create a zap or How to setup trigger in zapier.
-
Click on MAKE A ZAP button from your Dashboard page.
-
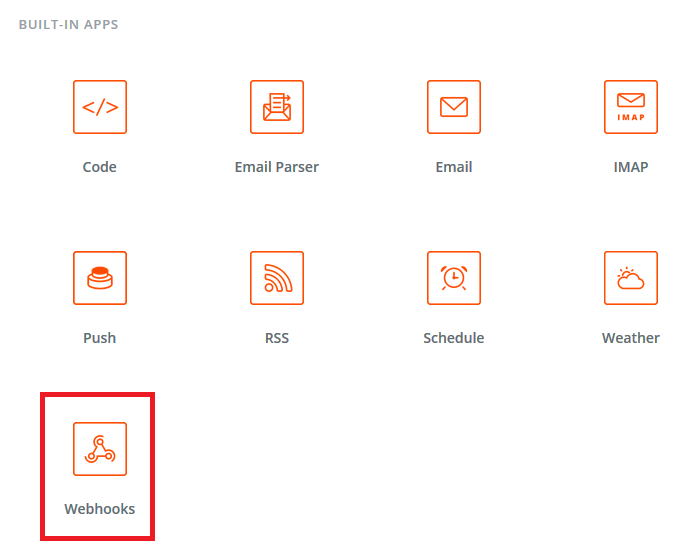
For set Trigger you need to select Webhooks app from Built-In apps list.
Please see below screen.
-
Then after need to select app trigger. There is must need to select Catch Hook. It's important that you select this trigger otherwise the integration will not work.
Please see below screen.
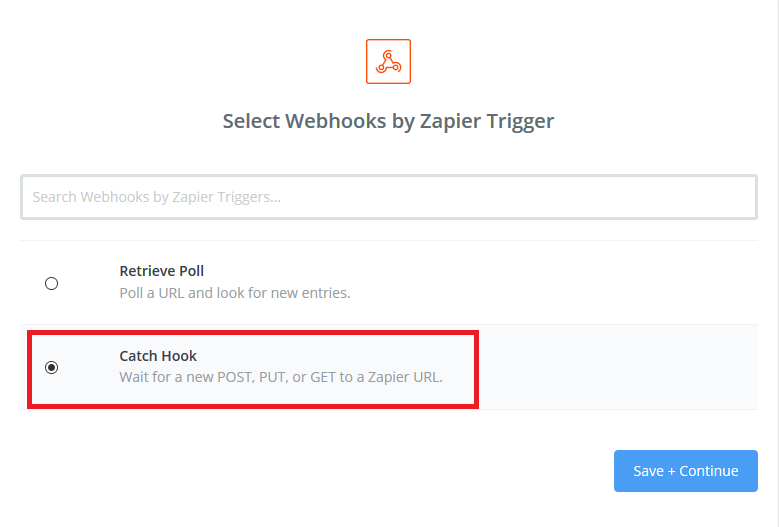
After select the trigger click on Save + Continue button.
-
Then the below screen will be display.
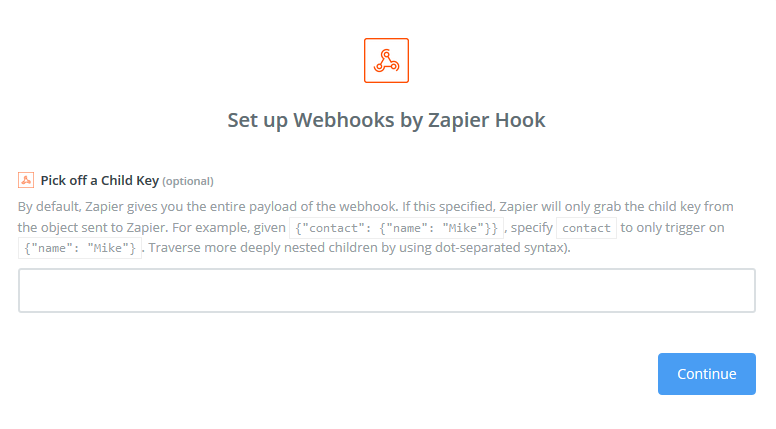
There is no need enter any text in the text box. So you will be able to get all field list that you selected on zapier setting page in zapier action.
If you specify the child key from the object then you will only access the child key in action.
-
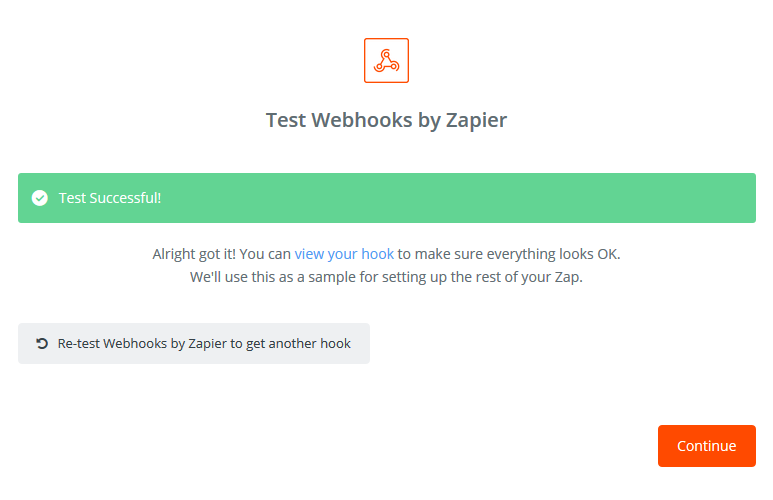
Click on Continue button so you will see the below screen.

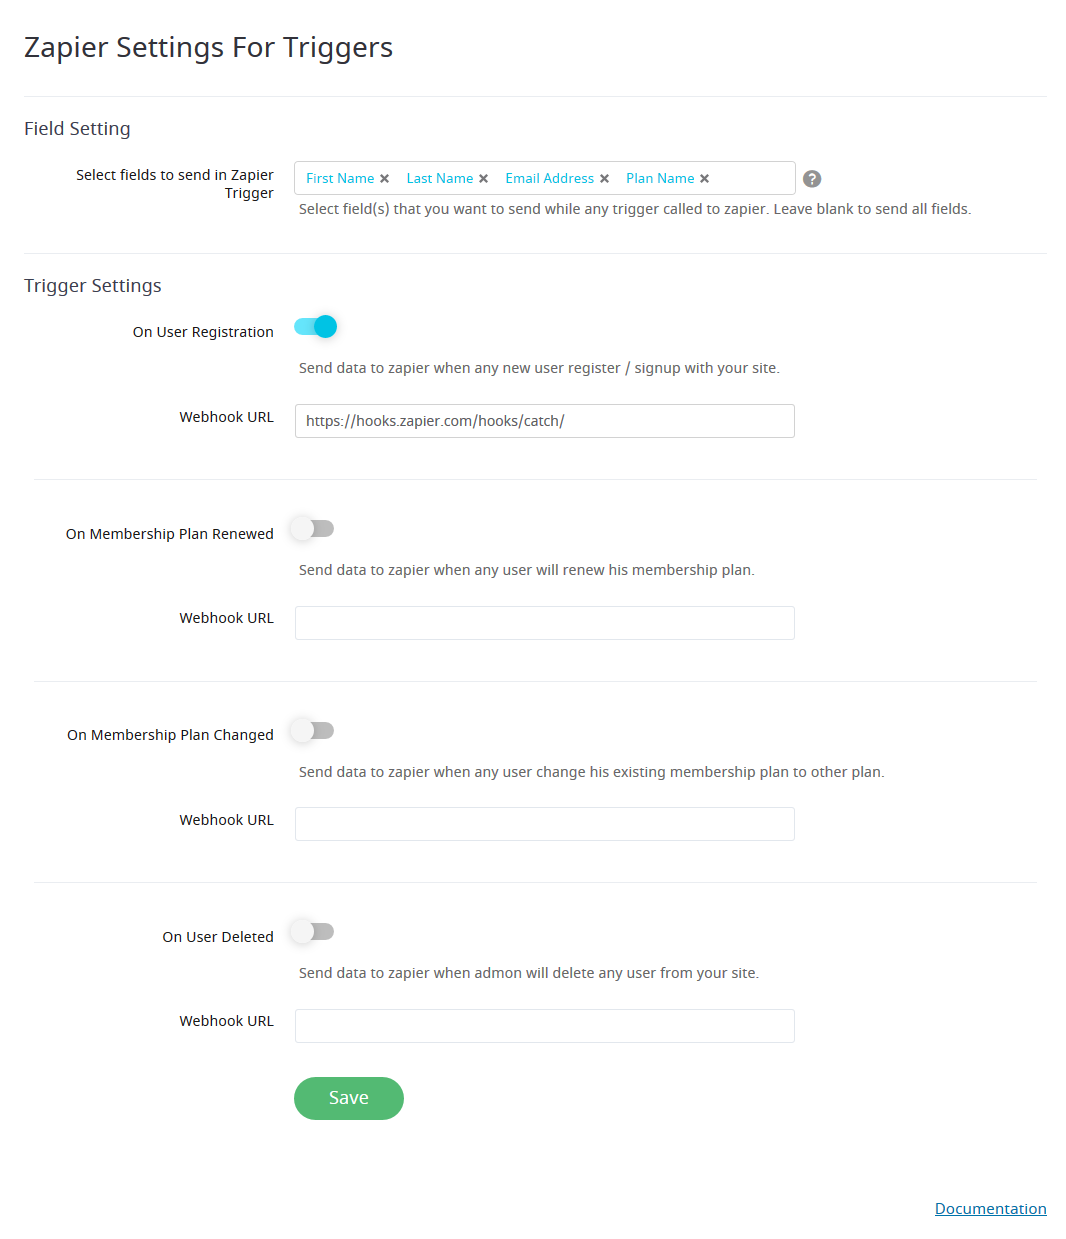
Copy the Webhook URL and set into Webhook URL in ARMember Zapier setting page.
If you want to send data to app when user register on your site then enable On User Registration and set the webhook url in Webhook URL text box.
If you want to send data to app when user renew plan on your site then enable On Membership Plan Renewed and set the webhook url in Webhook URL text box.
If you want to send data to app when user change plan on your site then enable On Membership Plan Changed and set the webhook url in Webhook URL text box.
If you want to send data to app when user delete on your site then enable On User Deleted and set the webhook url in Webhook URL text box.
After set the webhook url. Click on save button.
After save the ARMember Zapier settings, Click on OK, I did this button on your zapier account.
-
Then perform the action in website that you have set webhook URL.
So Zapier webhook is tested and the field list will be display in Action. It's important that you test the trigger otherwise the field list will not appear in action app.
When you done the action in website than you can see the below screen in you zapier account.
-
Click on Continue button. You have successfully set the trigger in your zapier account.
-
Now you can set action in your zapier account.
Select app that you want to set action and select action for the selected app.
You can connect a new account or If you have already connected an account, Than you will select an specific account.
After connect the app need to set required field and test the connected app.
When you successfully test the connected app then after click on finish button and insert ZAP name.
If created ZAP is on in your zapier account then the data will be synchronize.
- For more information about how to create zap Click here.